I love NPR. Our family listens to Up First every morning during breakfast & KCUR every evening when we cook dinner. We’re proud contributors.
Last year, I built a simple macOS App that lets you stream your favorite NPR station from your menubar. We’re going to recreate that.
End Result
At the end of this 2-part series, we will have made a menubar macOS app to stream NPR stations. We’ll have “reverse-engineeered” the way to search for stations via zipcode and built a macOS menubar app with the following features:
- ability to livestream an NPR station
- integration with macOS media key shortcuts
- a standalone
Preferenceswindow - ability to change & save stations for future app launches.
This will all be done using Swift.
Requirements
I am going to assume you have the following installed:
Step 0: Create the Project
Note: if you'd like to skip this step, you can simply download the starter project.
First things first, let’s create the project.
In Xcode, go to File → New → Project. You’ll see a dialog similar to below —
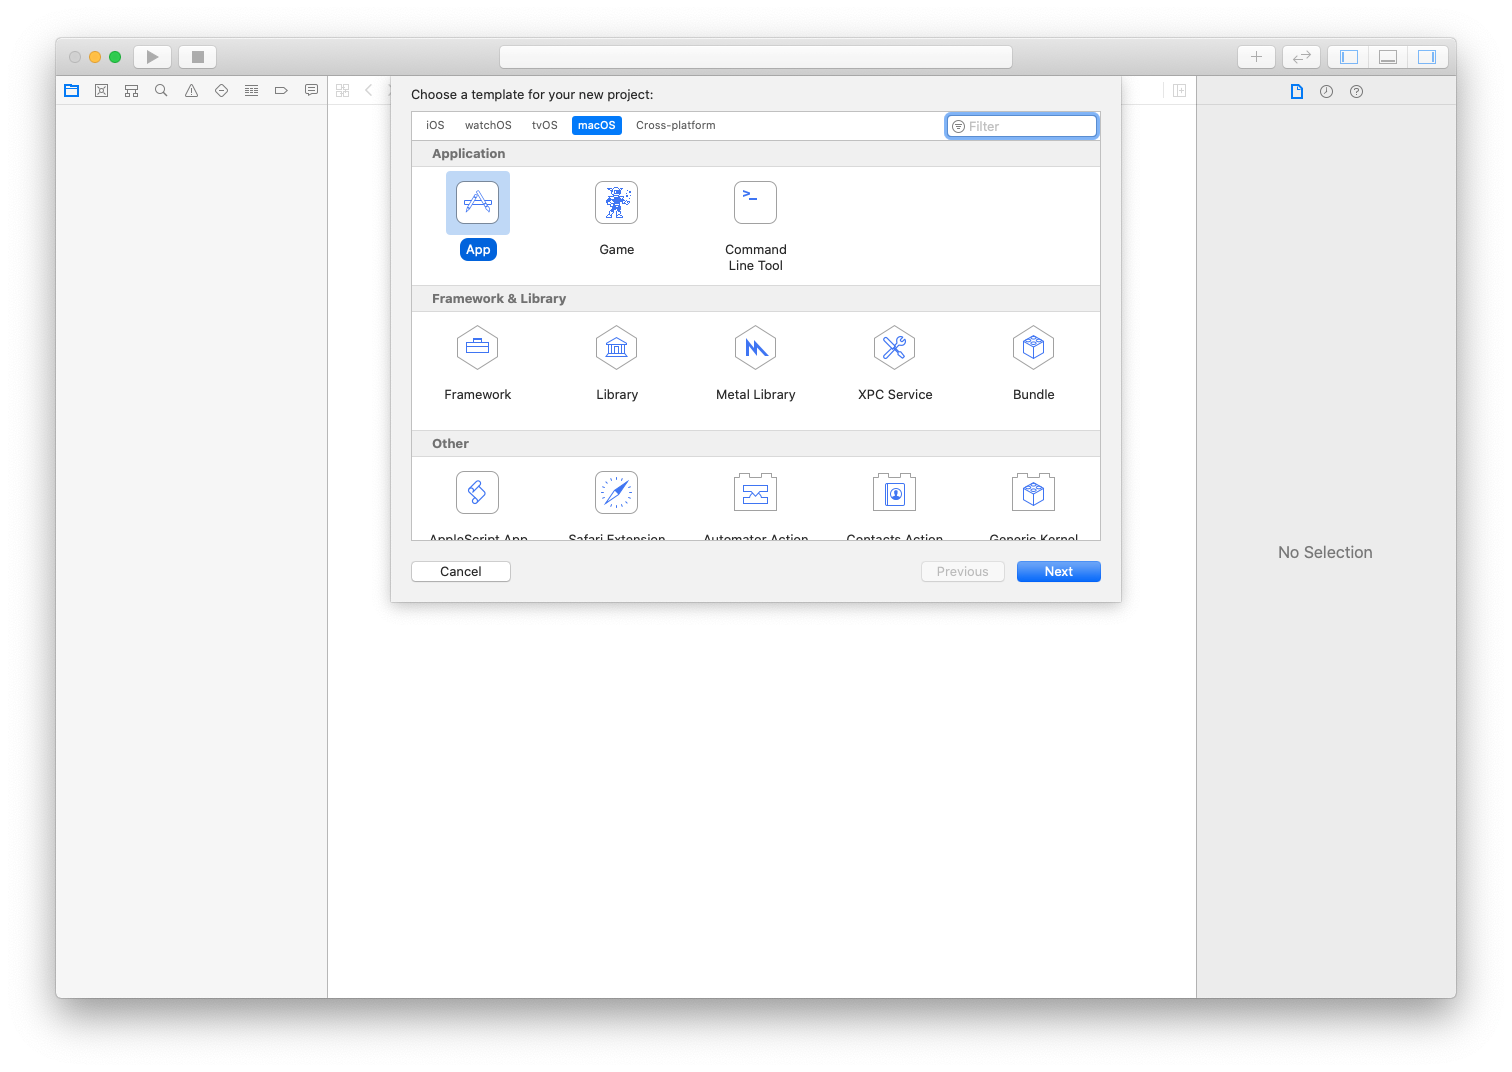
Select the macOS tab, and be sure that App is selected.
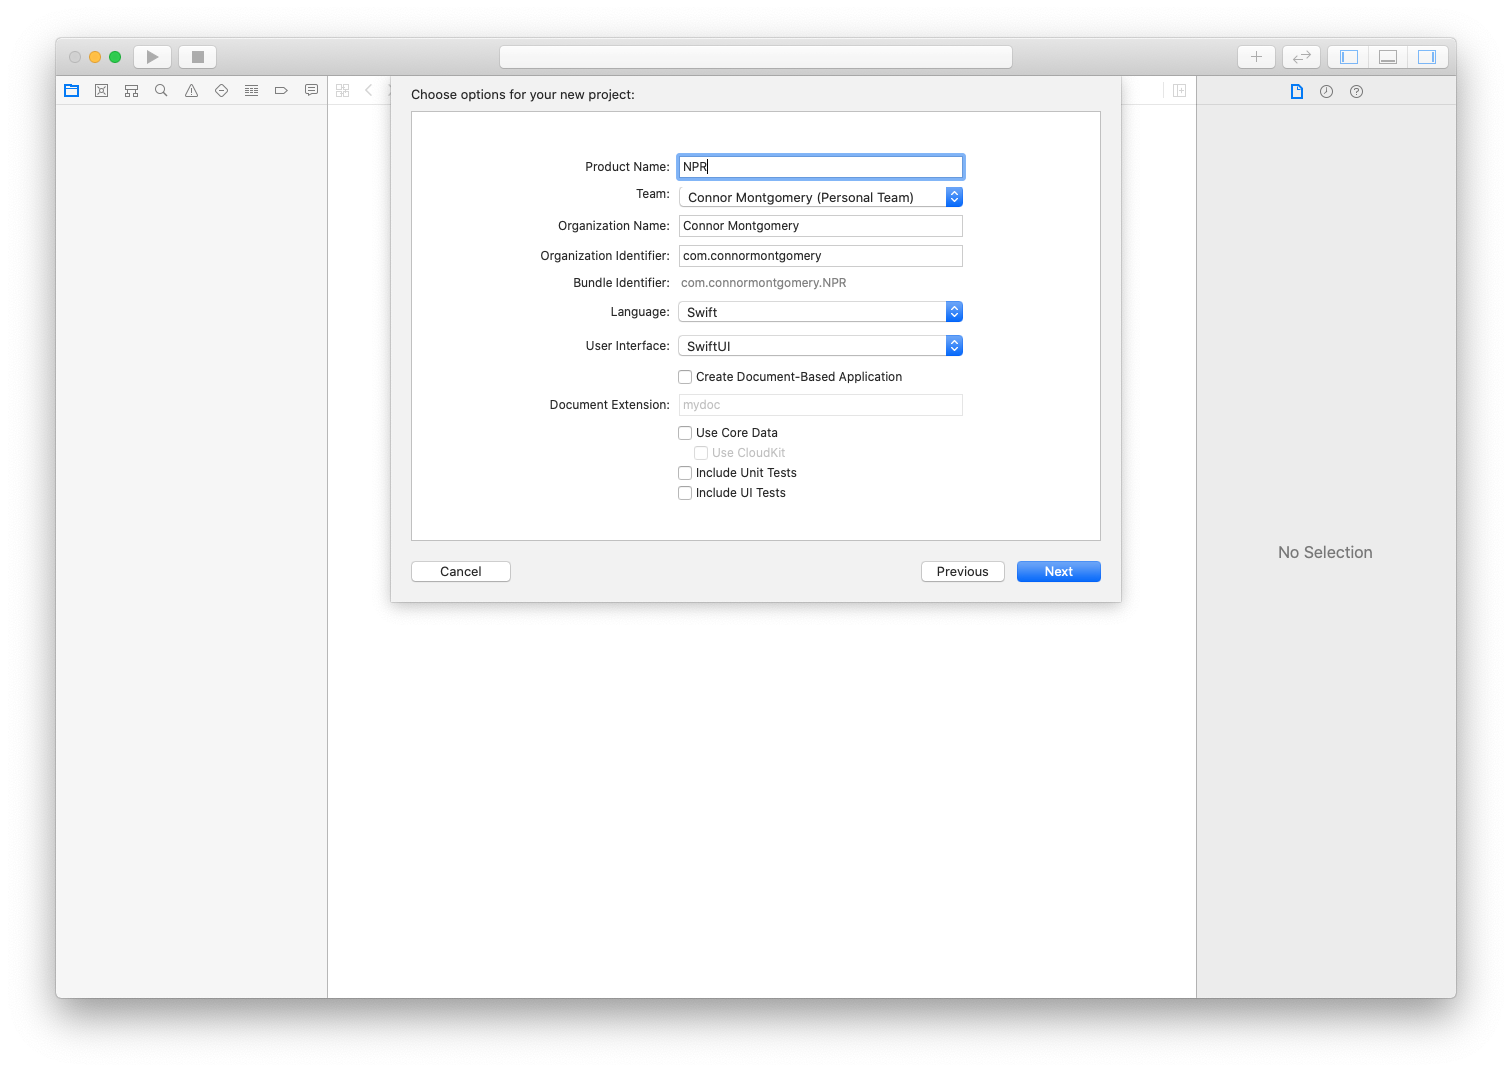
In the next step, give the project a name (I chose NPR) and be sure that it is a Swift project. Even though we won’t be using SwiftUI, let’s set the project to use SwiftUI for the User Interface. This will make it easier to start from a clean slate.
Remove what’s unnecessary
Like I mentioned above, this won’t actually be using SwiftUI. Let’s remove some of the unnecessary code that was generated.
- Delete the ContentView.swift file.
- In AppDelegate.swift, you can remove everything in the
applicationDidFinishLaunching(_ aNotification: Notification)method.- You can also remove the SwiftUI import, and delete the other method stubs if you’re so inclined!
This is what my AppDelegate.swift looks like (again, you can download the starter project if you’d prefer):
AppDelegate.swift
import Cocoa

@NSApplicationMain
class AppDelegate: NSObject, NSApplicationDelegate {

    var window: NSWindow!

    func applicationDidFinishLaunching(_ aNotification: Notification) {

    }
}
Ok, Build & Run the project. You should have an empty App show up in your Dock. Woohoo!

Step 1: Stream the audio
Finding the audio stream
Before we build out any UI, let’s get an audio stream going.
Fortunately, NPR has a way to find a station via a city, state or zip code. If we pop open the Web Inspector and go to the Network tab, we’re able to see what HTTP requests the webpage is making. Let’s look to see if we can find out how it works…
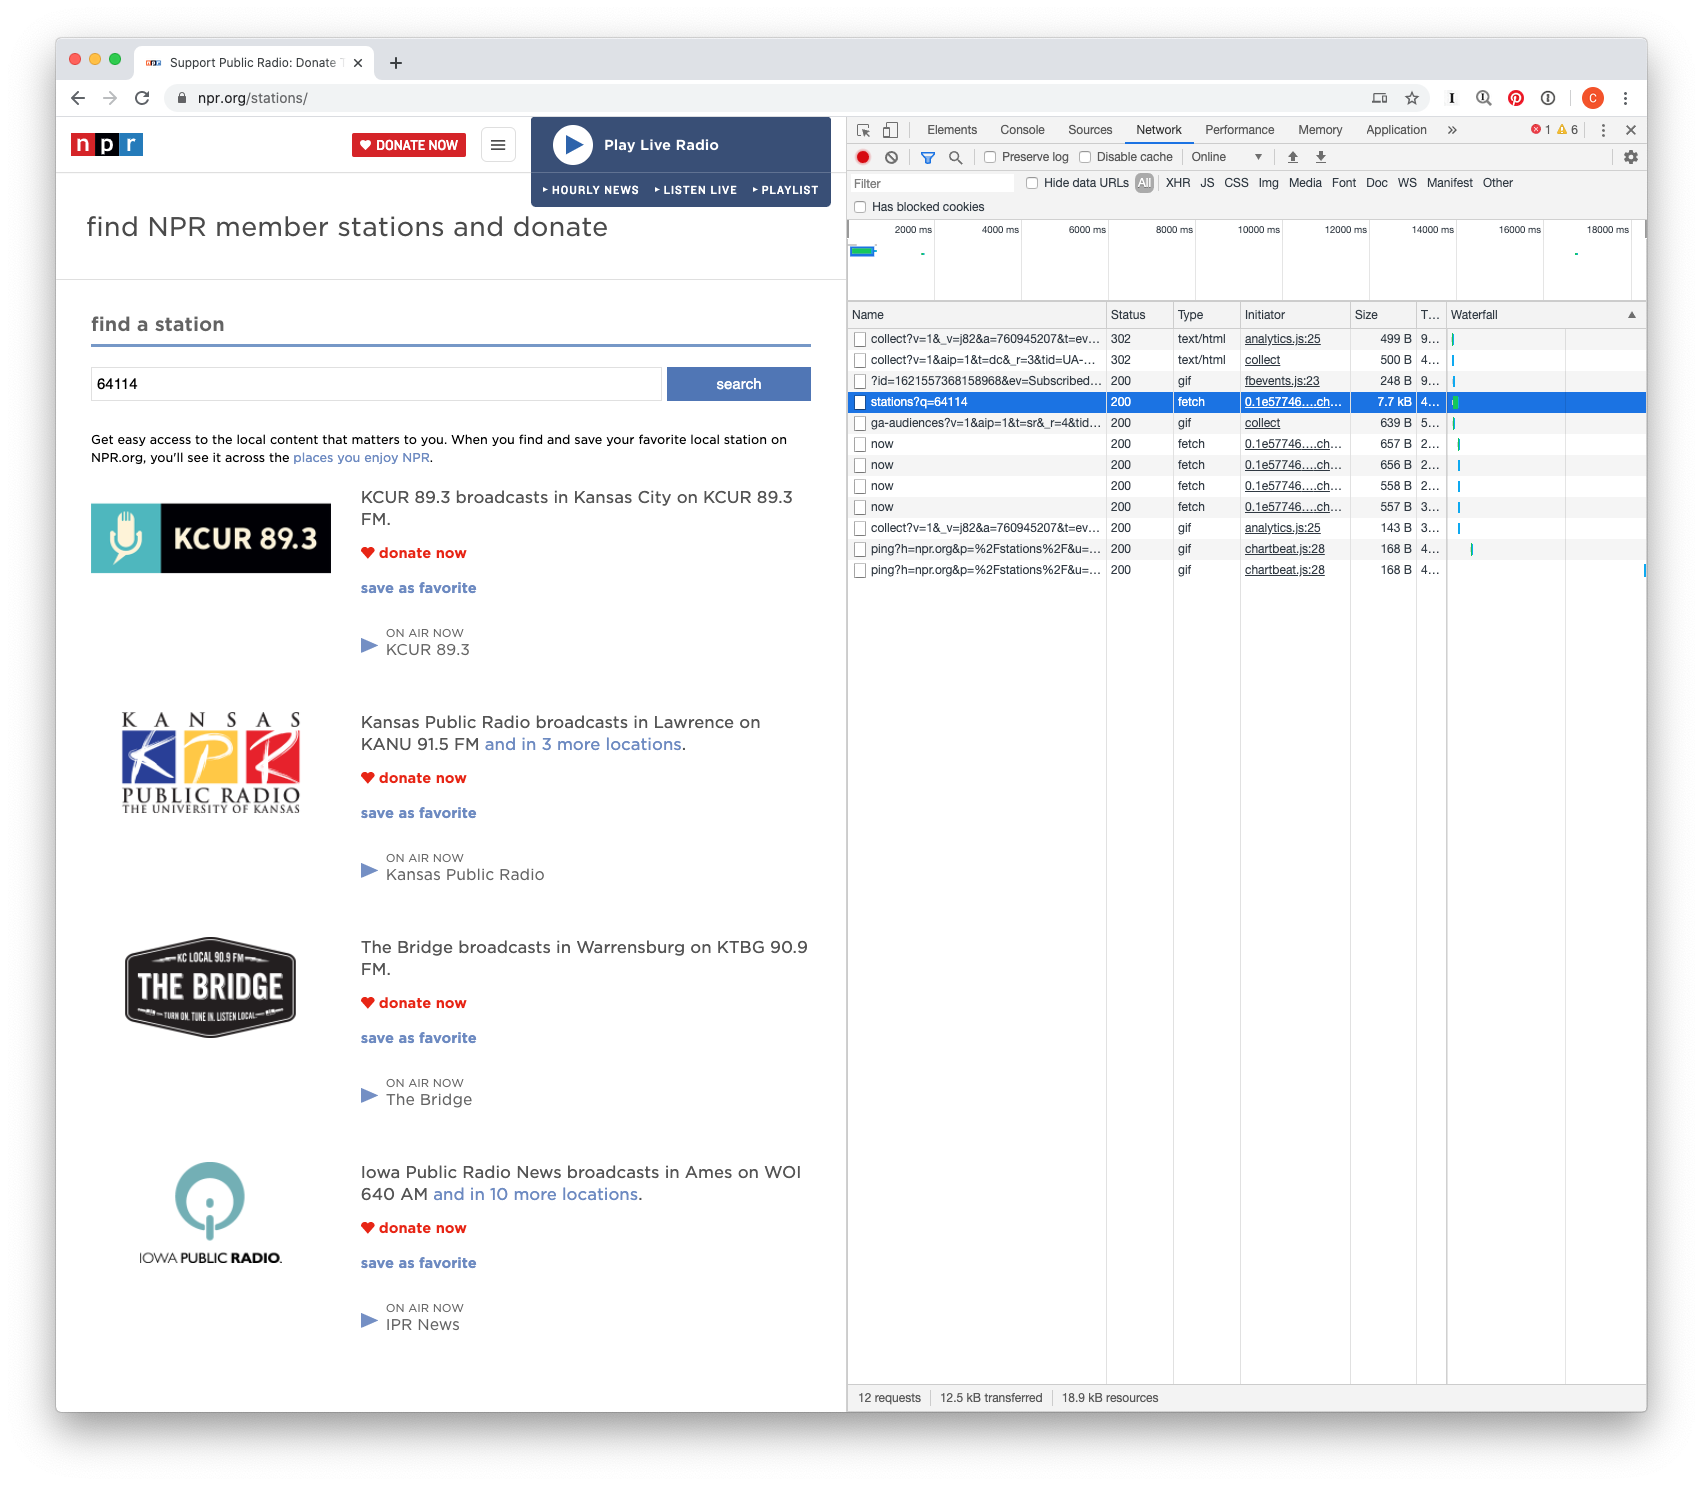
Bingo! Looks like the NPR page is hitting a /stationfinder endpoint, and passing the input as a query string parameter.
If we look at the Preview tab of that request, we can unpack the response a bit and further understand what’s happening under the hood.
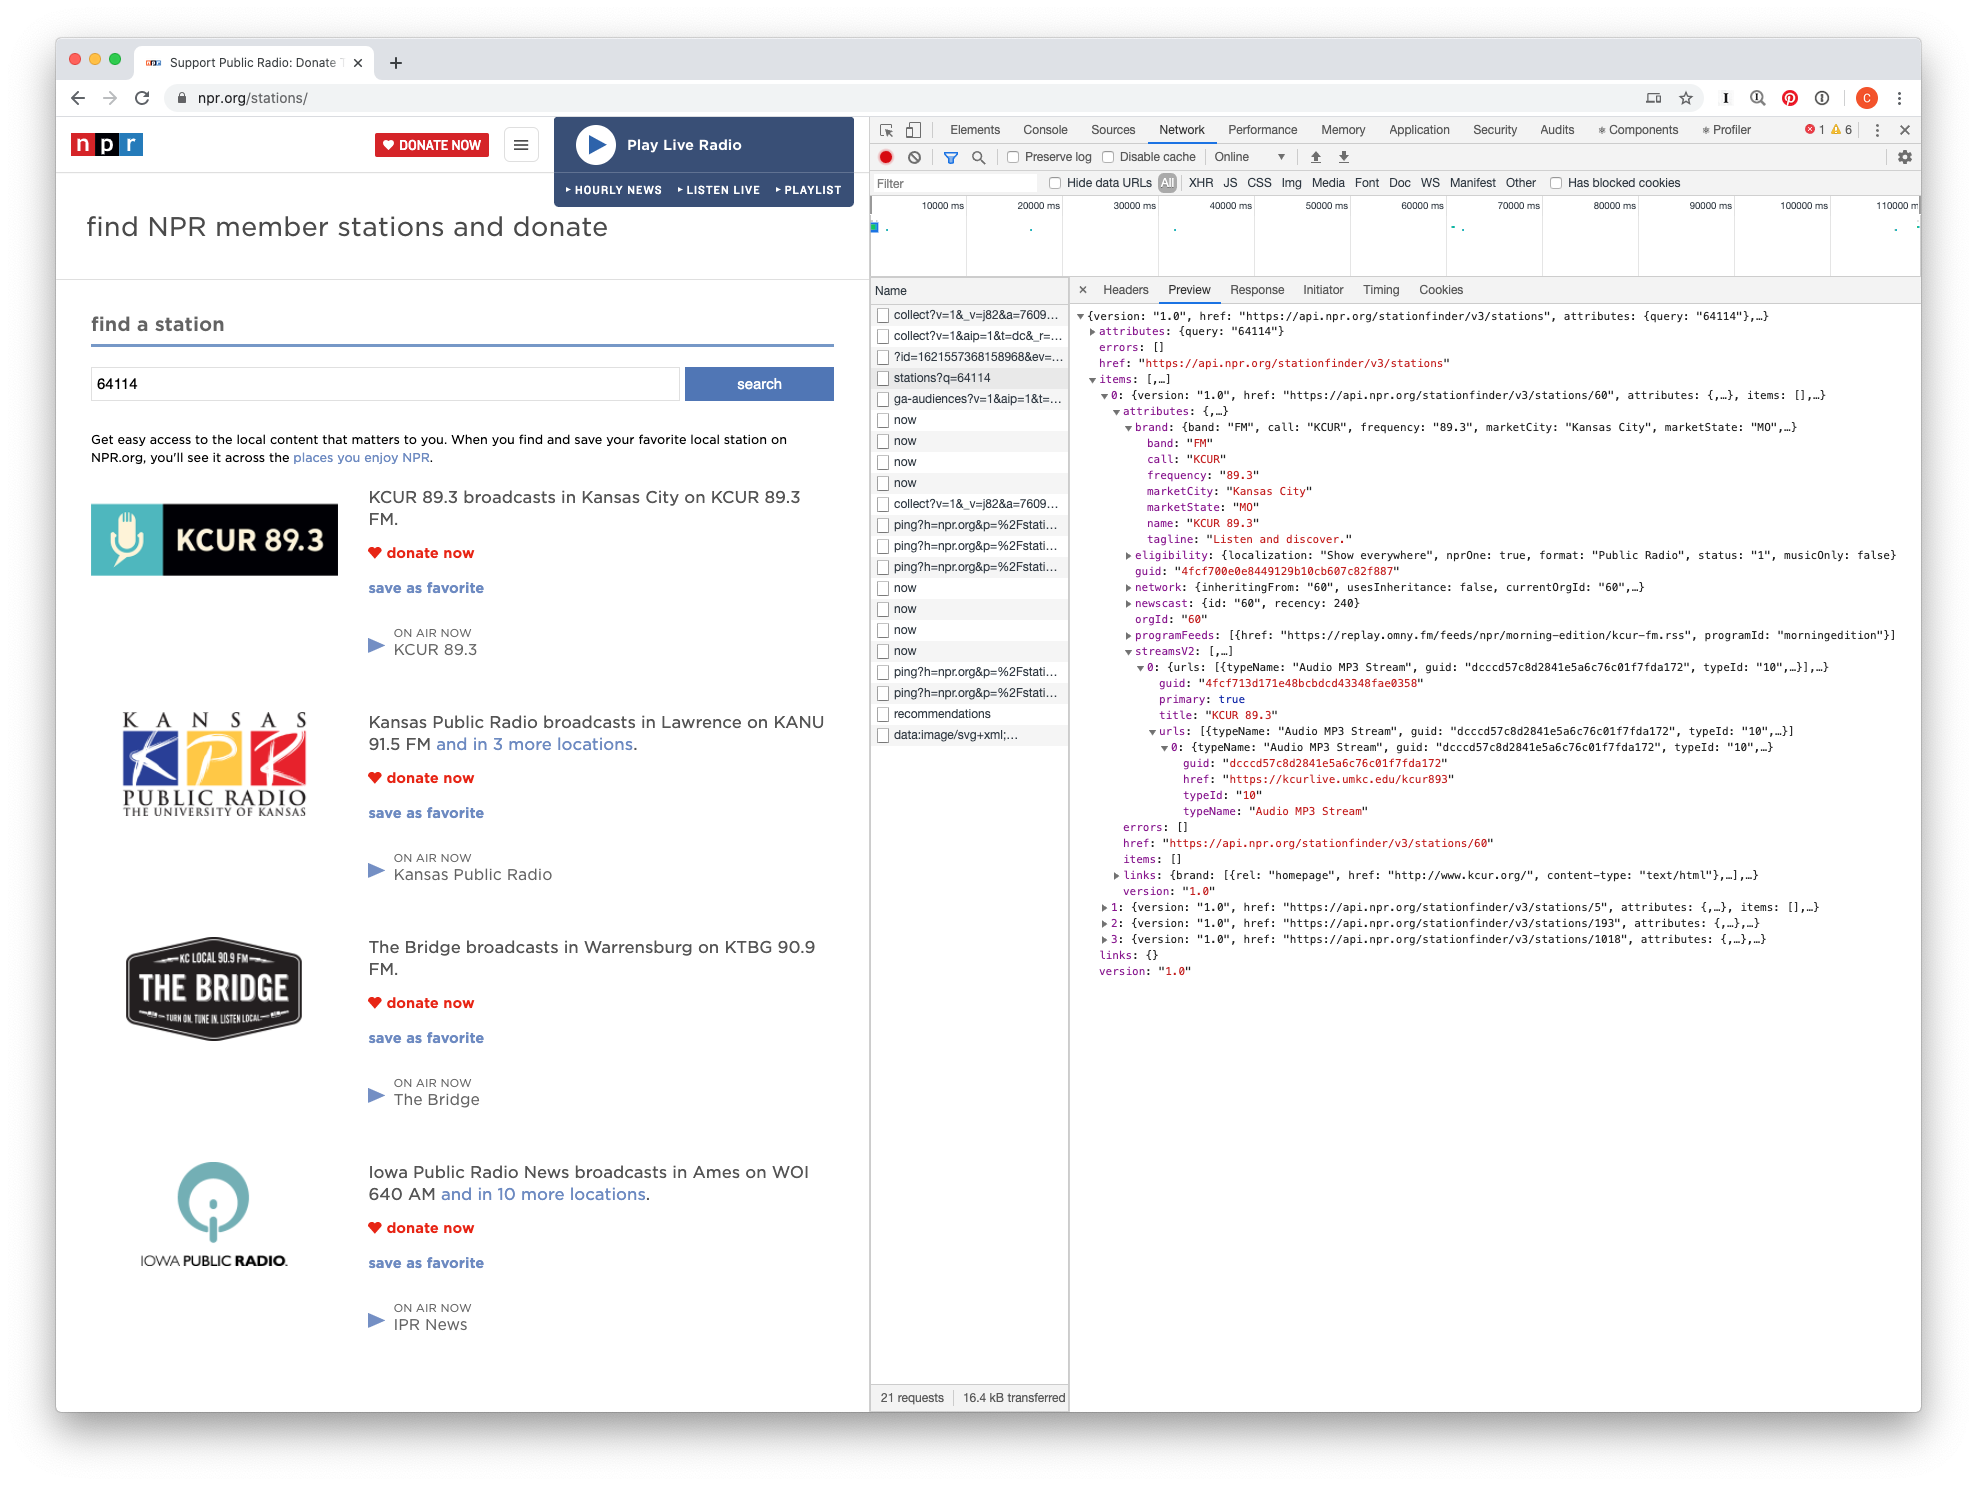
Looks like there is a streamsV2 key with an urls array. Each url has an href which looks like it points to an audio stream. Pop that into a new tab in your browser and…
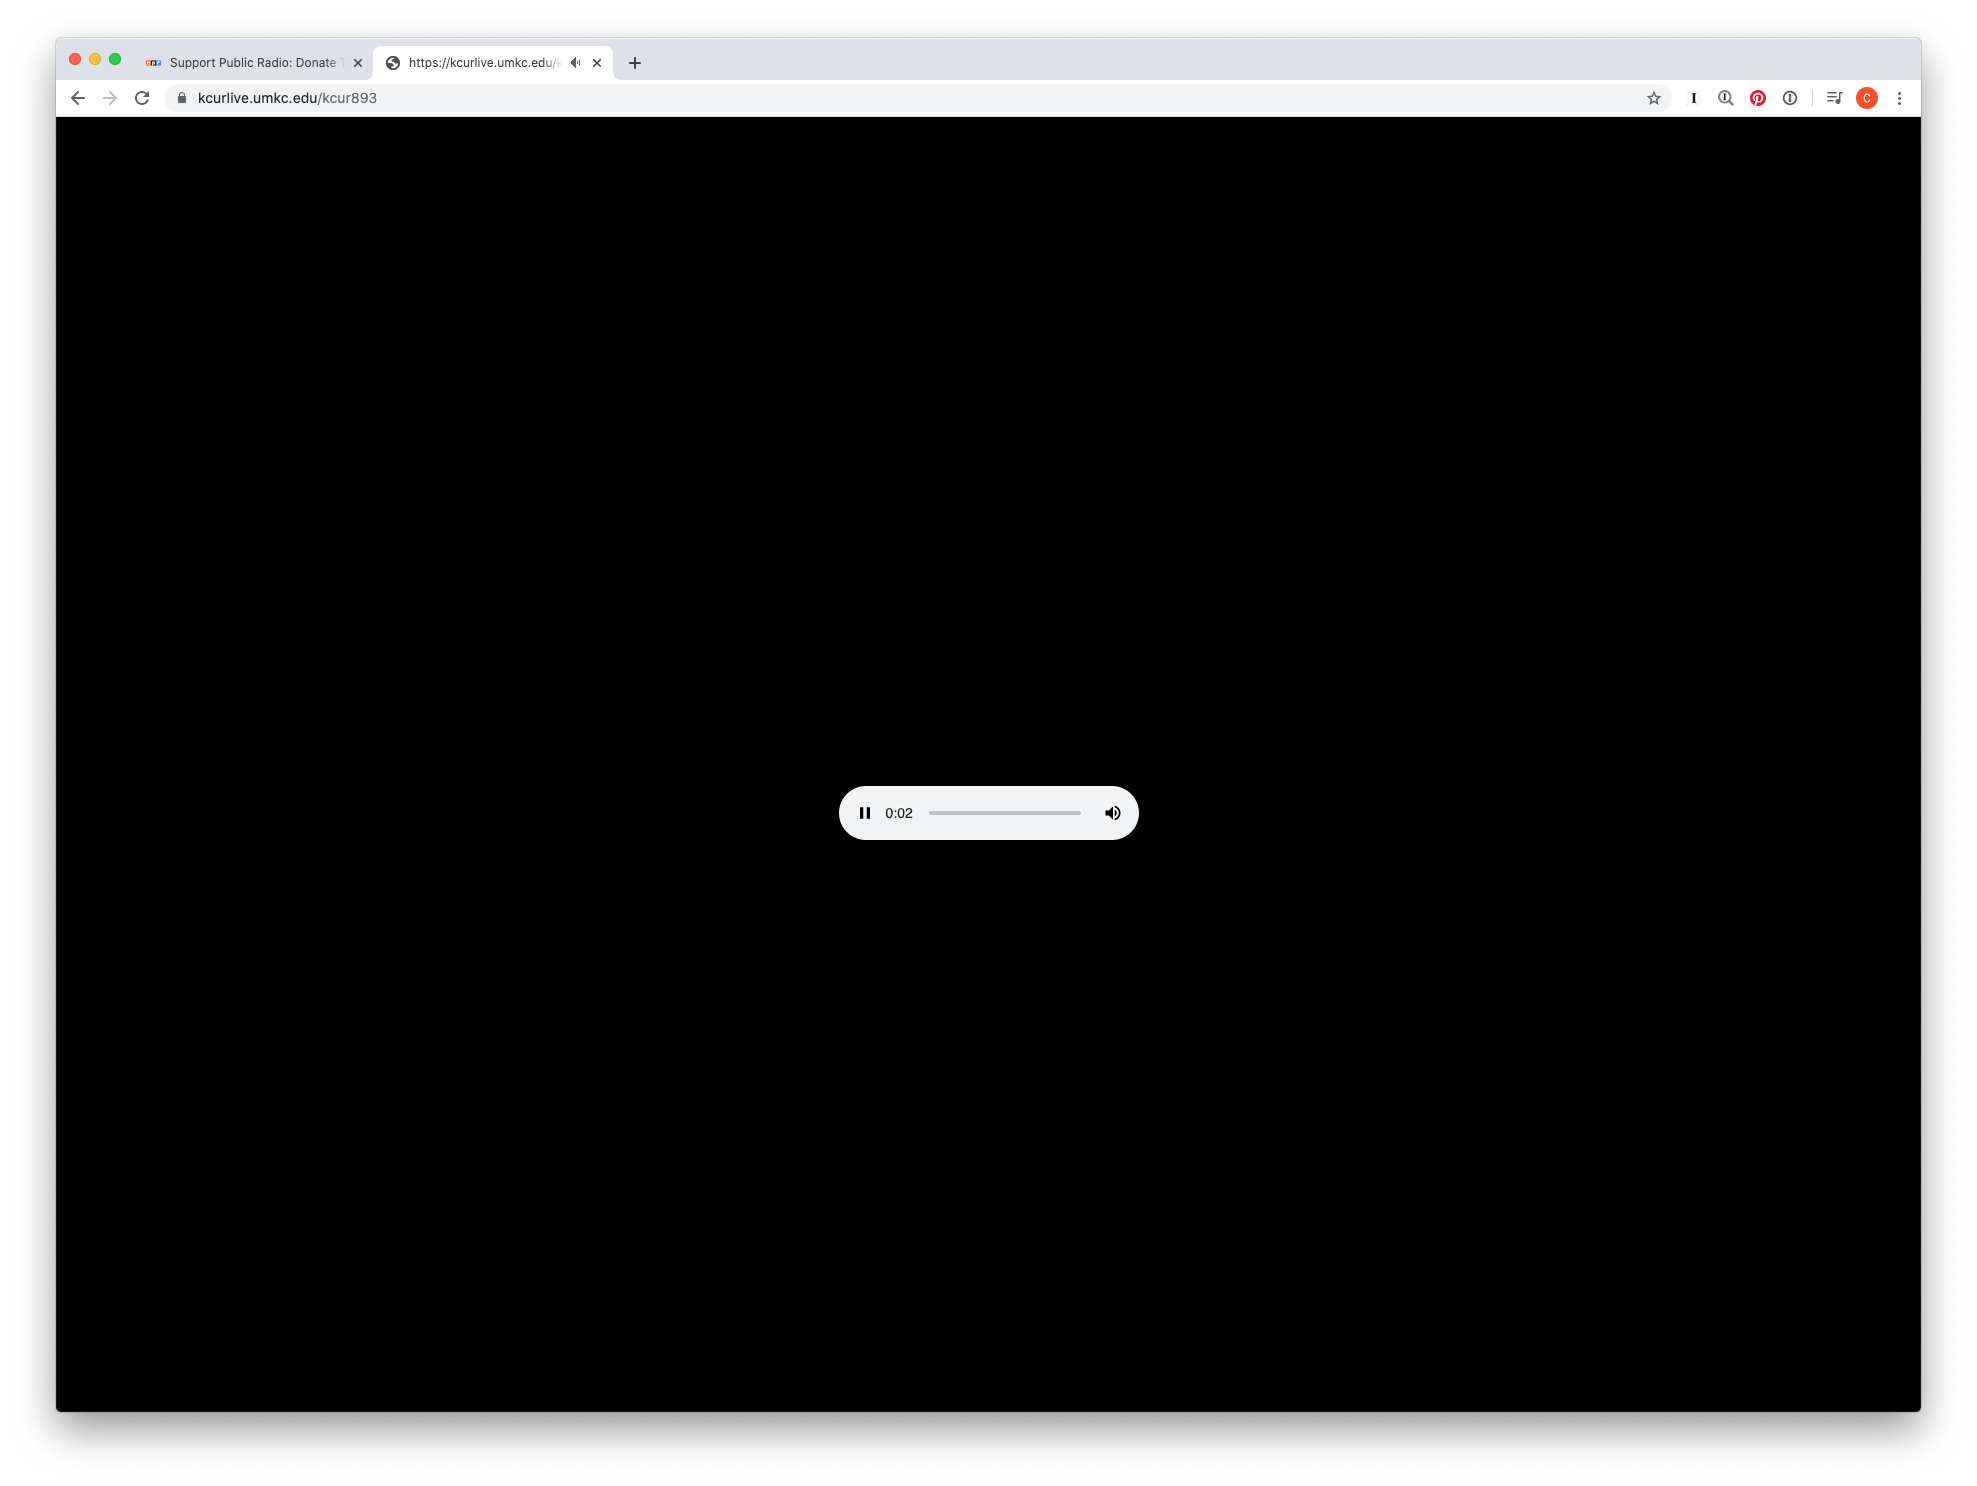
voilà! You should be able to play that stream right from your browser. High five! This is some progress.
Note: I recently learned that the NPR One Developer Center documents a Station Finder Service. If you were building a mass-distributed app, that would be the method you should use. Thanks, Jon!
Be sure to note the URL of the audio stream somewhere; we’re going to be using that here shortly.
Ok, so after doing some digging, we know how to find stations. Lets see how we can actually stream the station on a macOS app…
Streaming audio in Swift
On iOS, macOS, watchOS & tvOS, there is a handy framework provided by Apple, AVFoundation, that allows you to play and create audiovisual media. We’re going to be using that.
Basically, you have an instance of the AVPlayer class, and you give it an AVPlayerItem. That’s it.
AppDelegate.swift
import Cocoa
import AVFoundation

@NSApplicationMain
class AppDelegate: NSObject, NSApplicationDelegate {

    var window: NSWindow!
    let player = AVPlayer()

    func applicationDidFinishLaunching(_ aNotification: Notification) {
        guard let streamURL = URL.init(string: "https://kcurlive.umkc.edu/kcur893") else { return }
        let streamItem = AVPlayerItem.init(url: streamURL)
        player.replaceCurrentItem(with: streamItem)
        player.play()
    }
}
Pretty simple, right? We just create an instance of AVPlayer and call replaceCurrentItem with an AVPlayerItem we created with the URL of the audio stream. Finally, we play() the player.
Go ahead and Build & Run the project…
…and nothing is happening.
I don’t know about you, but I was expecting that to work! It’s not a big deal; this trips me for almost every macOS app I write.
Pop open the Debug area (View → Debug Area → Show Debug Area) and check out what’s in there. You’re probably seeing something like this:
Task <E0B567FC-415F-4169-94B1-47B3486118BA>.<1> finished with error [-1003] Error Domain=NSURLErrorDomain Code=-1003 "A server with the specified hostname could not be found." UserInfo={_kCFStreamErrorCodeKey=-72000, NSUnderlyingError=0x600000c8e7c0 {Error Domain=kCFErrorDomainCFNetwork Code=-1003 "(null)" UserInfo={_kCFStreamErrorCodeKey=-72000, _kCFStreamErrorDomainKey=10}}, _NSURLErrorFailingURLSessionTaskErrorKey=LocalDataTask <E0B567FC-415F-4169-94B1-47B3486118BA>.<1>, _NSURLErrorRelatedURLSessionTaskErrorKey=(
    "LocalDataTask <E0B567FC-415F-4169-94B1-47B3486118BA>.<1>"
), NSLocalizedDescription=A server with the specified hostname could not be found., NSErrorFailingURLStringKey=https://kcurlive.umkc.edu/kcur893, NSErrorFailingURLKey=https://kcurlive.umkc.edu/kcur893, _kCFStreamErrorDomainKey=10}
tl;dr — macOS requires you to explicitly opt your app in to making and receiving network connections. Since this is streaming from a URL and not our local filesystem, we need to tell the app that making network requests is allowed.
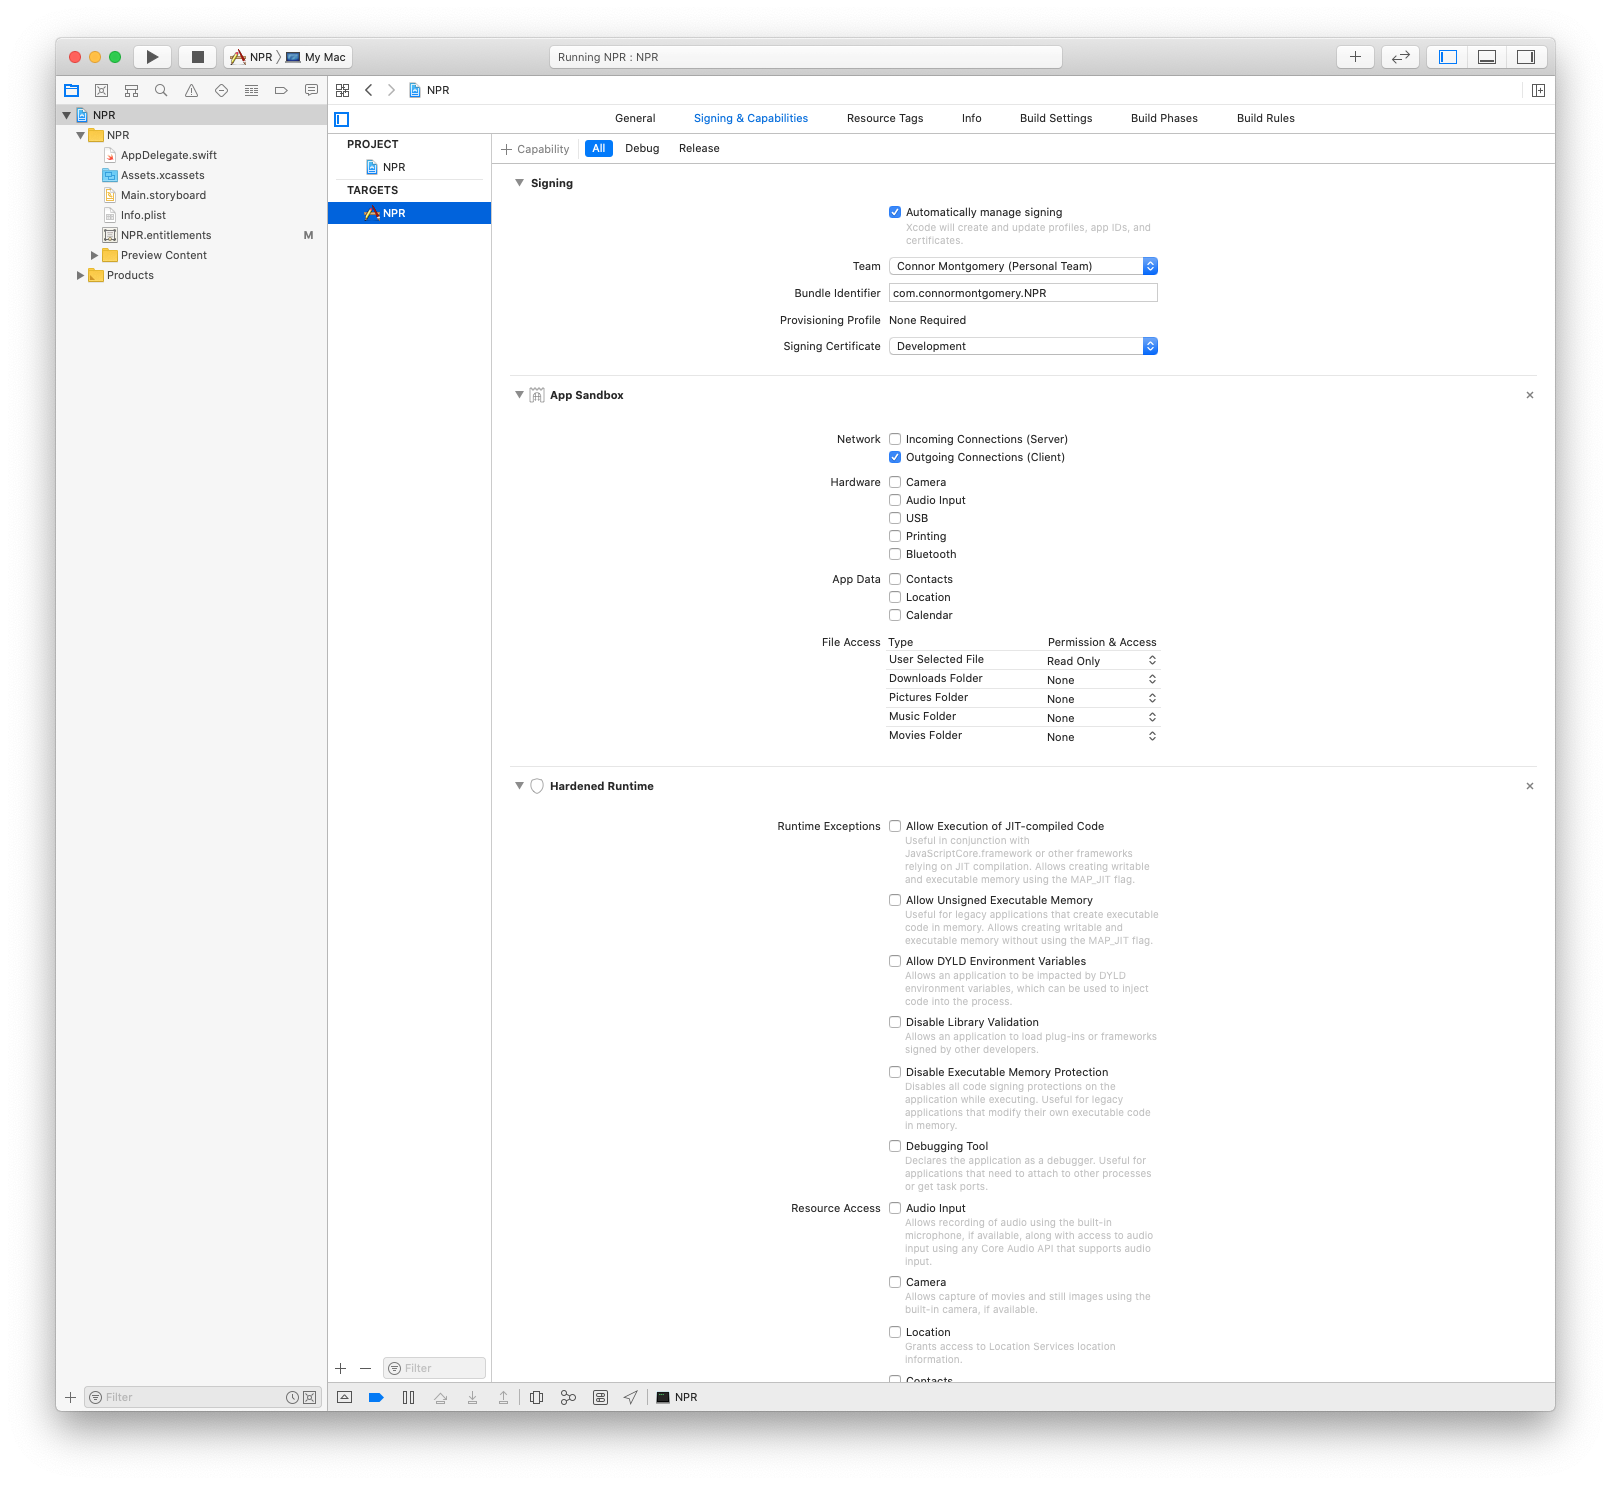
In the Xcode project editor, with your application target selected, view the Signing & Capabilities tab. From there, be sure to check Outgoing Connections (Client).
Now go ahead and Build & Run the project.
Still nothing? Hmm. Oh!
We also have to tell Xcode that our app can make requests to arbitrary servers.
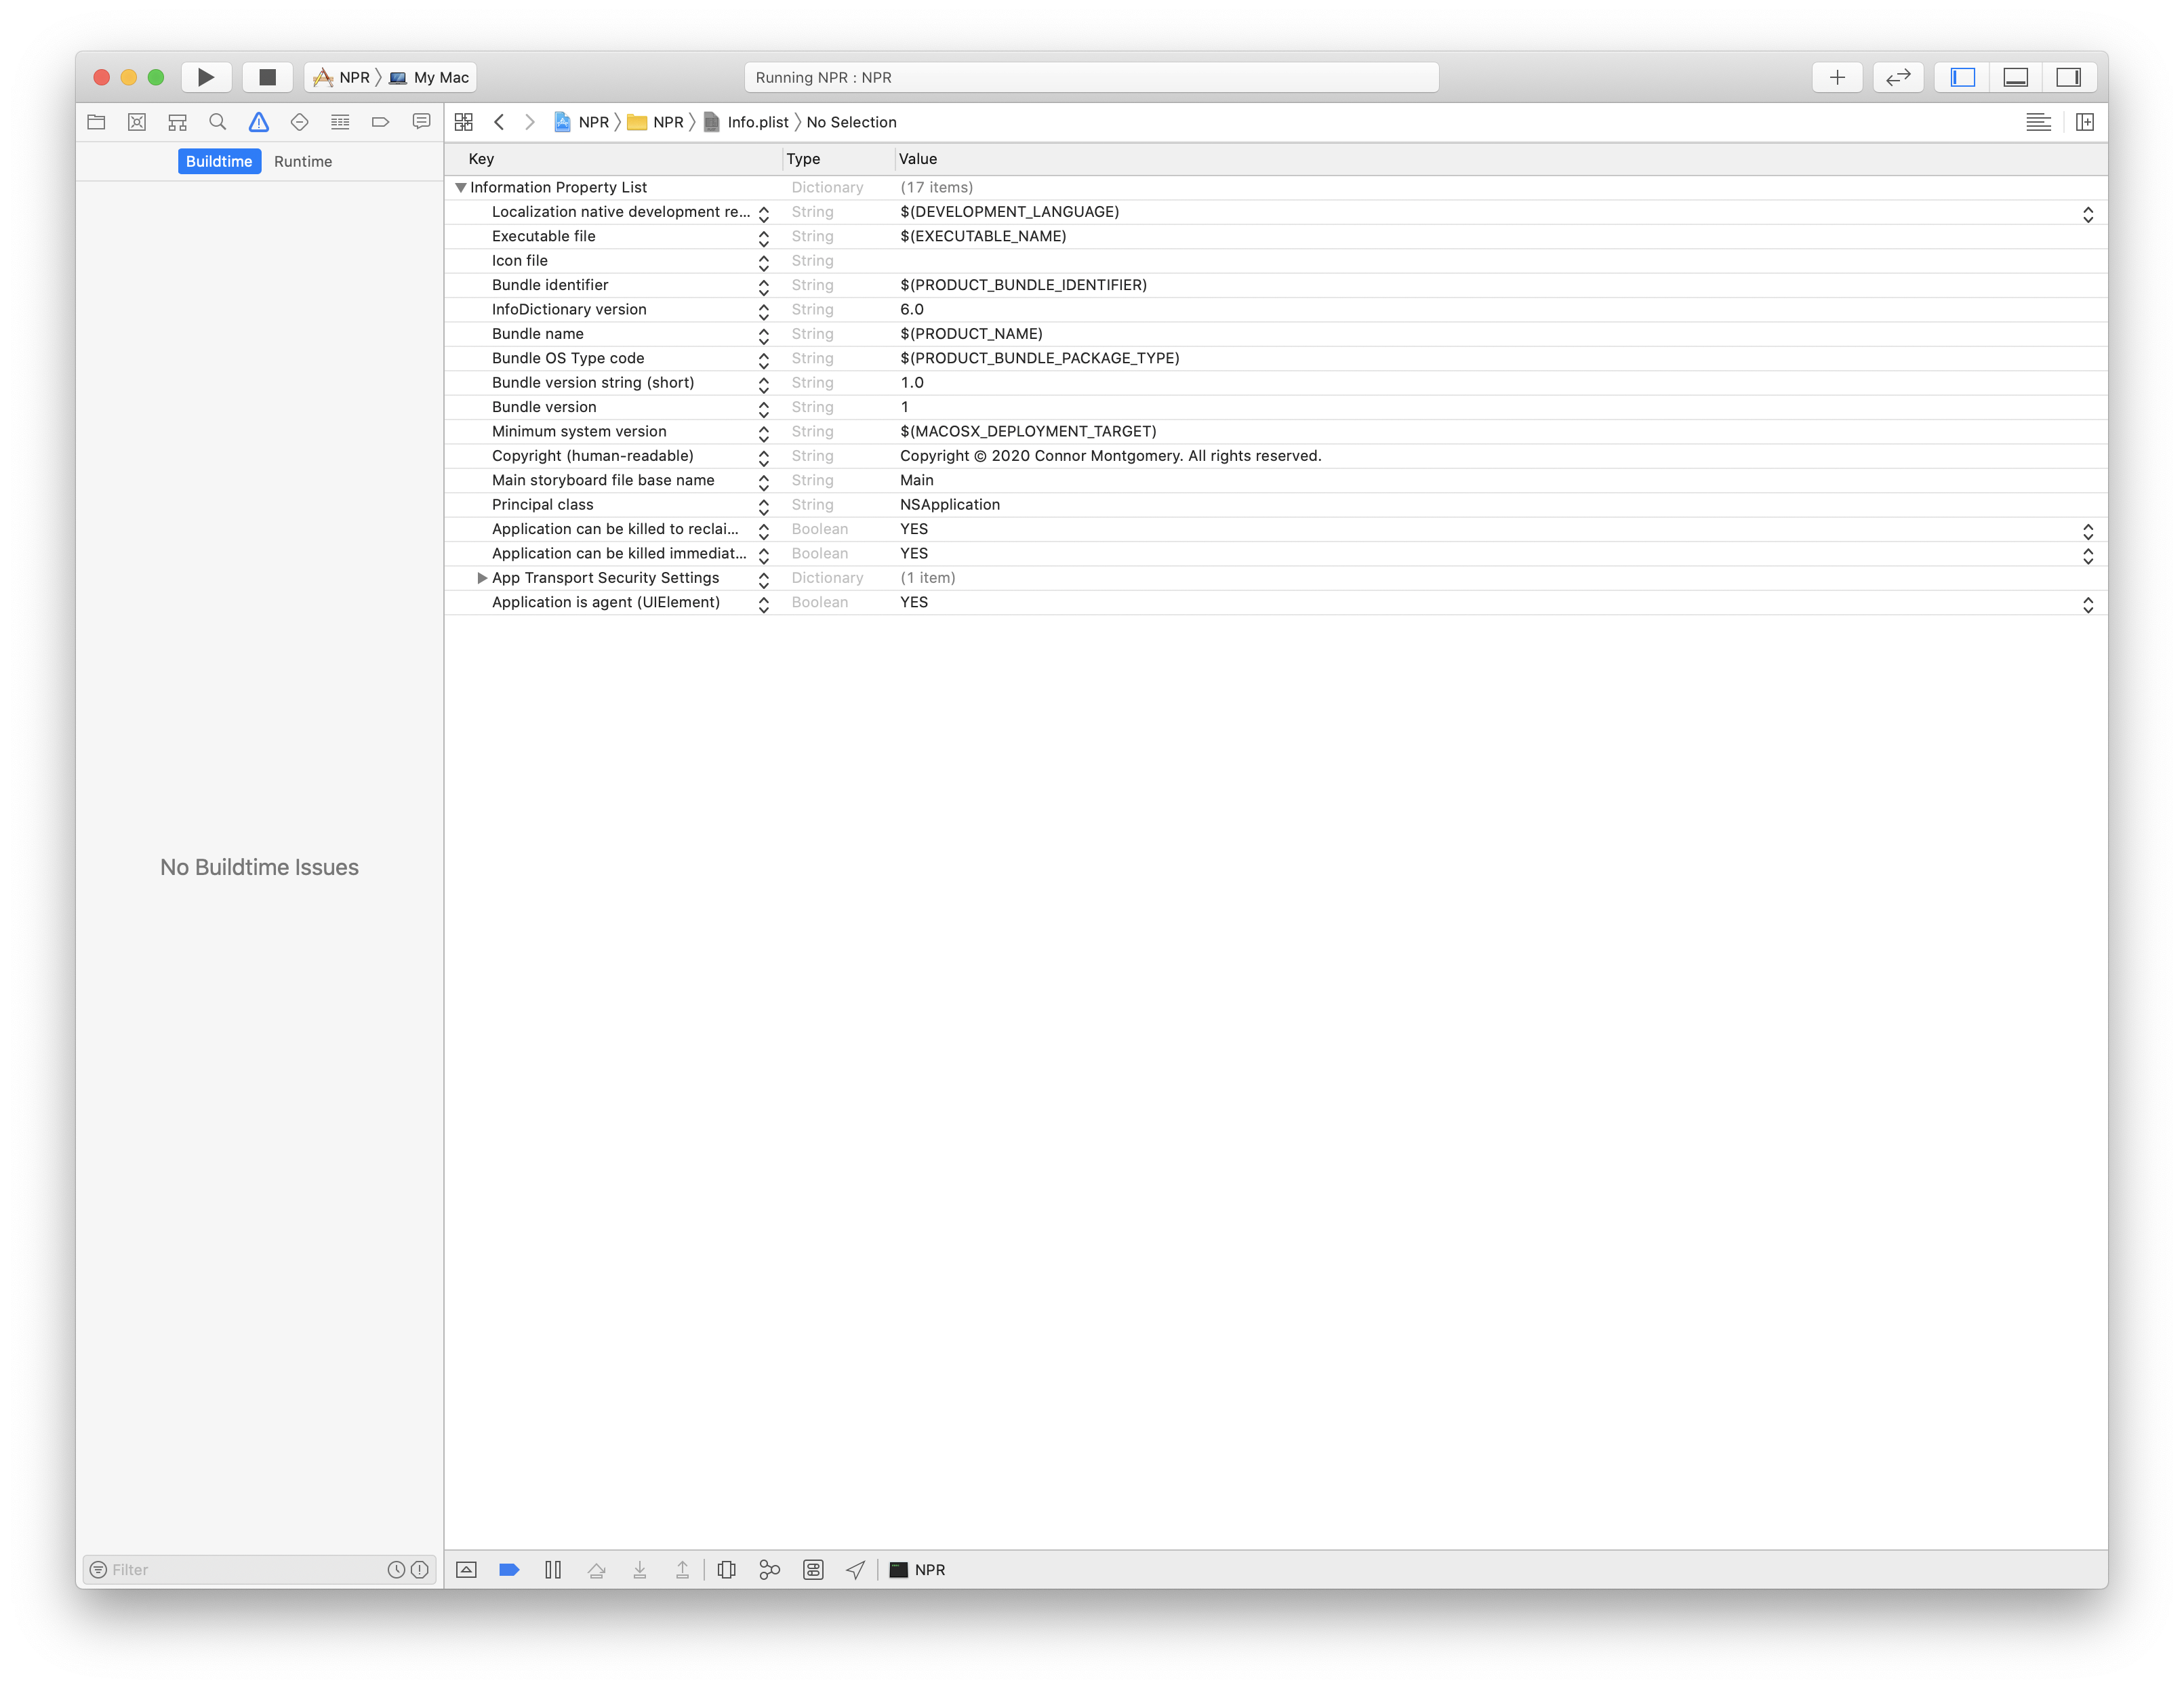
In your Info.plist file, add a new key, App Transport Security Settings of type Dictionary. Underneath that, add a key, Allow Arbitrary Loads and set the value of that to YES.
![]()
One more time, let’s Build & Run the project.
You should now be hearing audio streamed from an NPR station. High five!
Step 2: Adding a menuBar UI
It’s pretty simple to make a menuBar UI. For now, there are two main concepts —
NSStatusBar— an object that manages a collection of status items displayed within the system-wide menu bar.NSStatusItem— an individual element displayed in the system-wideNSStatusBar.
So, a StatusItem belongs to a StatusBar. StatusItem objects have buttons that you can style with either images or text.
Take the following code in AppDelegate.swift —
AppDelegate.swift
import Cocoa
import AVFoundation

@NSApplicationMain
class AppDelegate: NSObject, NSApplicationDelegate {

    var window: NSWindow!
    let player = AVPlayer()

    let statusBar = NSStatusBar.system
    var statusBarItem:NSStatusItem!

    func applicationDidFinishLaunching(_ aNotification: Notification) {
        guard let streamURL = URL.init(string: "https://kcurlive.umkc.edu/kcur893") else { return }
        let streamItem = AVPlayerItem.init(url: streamURL)
        player.replaceCurrentItem(with: streamItem)
        player.play()

        statusBarItem = statusBar.statusItem(withLength: -1)
        statusBarItem.button?.title = "Hello, world!"
    }
}
As you can see, we:
- keep a reference to the system
NSStatusBar - keep a reference to a
statusBarItem, which we initialize from the globalstatusBarreference with a-1length- note: the
-1length essentially means “variable length”. Meaning, the length dynamically adjusts to the contents.
- note: the
- we set the
titleof thebuttonon thestatusItemto be a string (in this case, “Hello, world!”).
Build & Run the project, and you should see a Hello, world! in your menu bar!

🖐🏻!
Toggling Play / Pause
Next up, we’ll add a little menu attached to the statusItem from above. Again, this is pretty simple —
AppDelegate.swift
import Cocoa
import AVFoundation

@NSApplicationMain
class AppDelegate: NSObject, NSApplicationDelegate {

    var window: NSWindow!
    let player = AVPlayer()

    let statusBar = NSStatusBar.system
    var statusBarItem:NSStatusItem!

    var menu:NSMenu = NSMenu()
    var isCurrentlyPlaying = false

    func applicationDidFinishLaunching(_ aNotification: Notification) {
        guard let streamURL = URL.init(string: "https://kcurlive.umkc.edu/kcur893") else { return }
        let streamItem = AVPlayerItem.init(url: streamURL)
        player.replaceCurrentItem(with: streamItem)
        player.play()
        isCurrentlyPlaying = true

        statusBarItem = statusBar.statusItem(withLength: -1)
        statusBarItem.button?.title = "Hello, world!"
        statusBarItem.menu = menu

        menu.addItem(NSMenuItem.init(title: "Play / Pause", action: #selector(togglePlayPause), keyEquivalent: ""))
    }

    @objc func togglePlayPause() {
        if isCurrentlyPlaying {
            player.pause()
            isCurrentlyPlaying = false
        } else {
            player.play()
            isCurrentlyPlaying = true
        }
    }
}
Now, when clicking the Hello World statusBarItem, we’ll se a Menu dropdown show, with a Play / Pause button. Go ahead, click it! It should toggle the audio stream to be, well, played or paused.

Tidying things up
This is working! That’s exciting. Nice job!
However, there are a few loose ends that I think we should tidy up before getting too far. Notably —
- An empty app launches in the Dock when the menubar app runs; we want it to only run in the menubar.
- The menubar title isn’t helpful.
- There’s no way to quit the app.
Let’s fix those up —
Only showing in the menubar
This is a fairly common use case on macOS, so after some quick googling I found the answer. Basically, we need to tell the OS, in our Info.plist file, that our app is an agent.

To do that, open the Info.plist file and add a new entry —
Application is agent (UIElement):YES
It should now look something like this:
If you Build & Run now, you’ll see that the app no longer shows an icon in the Dock and doesn’t show up in the ⌘ + Tab app switcher.
Making the menubar more helpful
Right now, our menubar button title says Hello, world!. Let’s make it the NPR logo.
First, download the icons. Go ahead and unzip that file.
In the Xcode project, ensure the Project Navigator is being shown by going to View → Navigators → Show Project Navigator.
In the Project Navigator, right-click Assets.xcassets and select Show in Finder. Simply drag the unzipped folders into that Assets.xcassets directory.
Now that the assets are added to the project, we can go ahead and swap out that Hello, world! for… something a bit more helpful 😉
In AppDelegate.swift, replace the Hello, world! line with this:
// Replace this line...
statusBarItem.button?.title = "Hello, world!"

// With this line...
statusBarItem.button?.image = NSImage.init(named: "npr-icon")
Build & Run the app and you should see the NPR icon in the menubar!
![]()
We’re making fantastic progress. This is starting to feel like a real app!
Adding the ability to Quit the app
Since we’ve been rebuilding the app all along, it has Quit itself for us. However, if/once we start distributing it, we’d need a way to actually Quit it. Fortunately, that’s trivial to add.
Back in AppDelegate.swift, after where the Play / Pause button is added, add a separator and a new button for Quit —
menu.addItem(NSMenuItem.init(title: "Play / Pause", action: #selector(togglePlayPause), keyEquivalent: ""))
menu.addItem(NSMenuItem.separator())
menu.addItem(NSMenuItem.init(title: "Quit", action: #selector(quit), keyEquivalent: "q"))
Now, if you try to Build & Run, Xcode will fail because we haven’t defined a quit method.
Just above the togglePlayPause() method, add this —
@objc func quit() {
    NSApp.terminate(nil)
}
If you Build & Run, now you should see a Quit button below a separator!
![]()
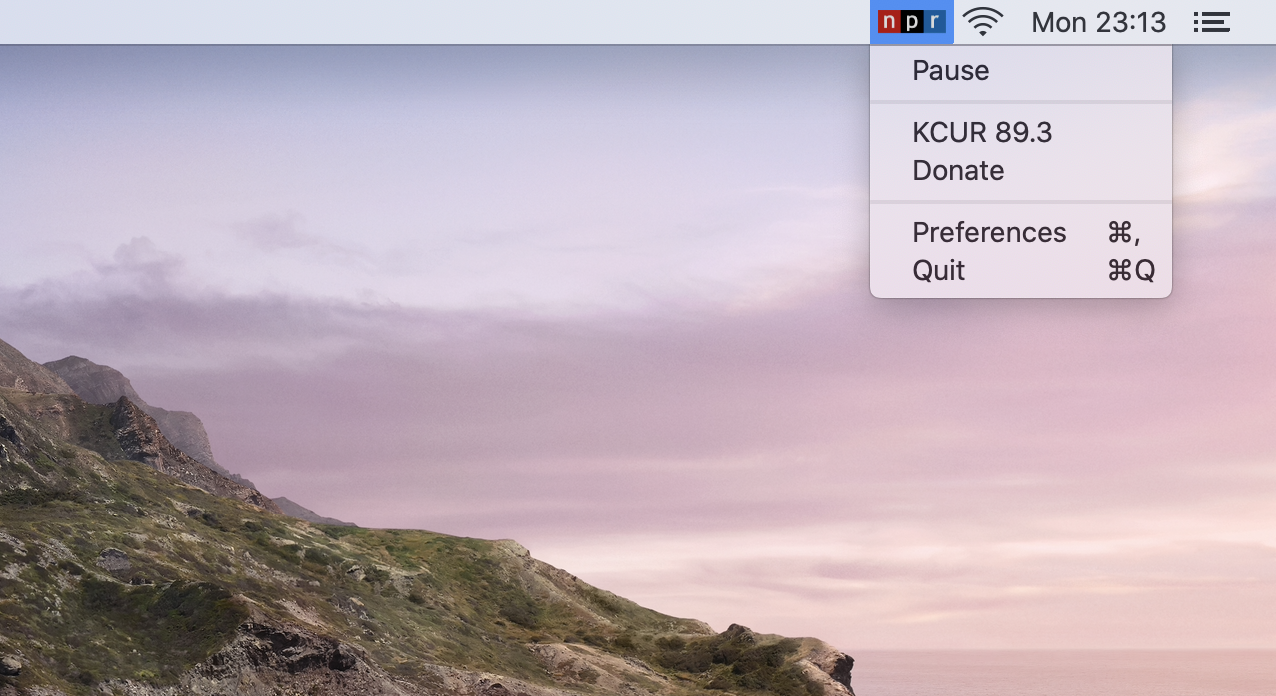
You should also notice that there is a keyboard shortcut, ⌘Q, automatically assigned to the Quit button. We got that functionality for free via the keyEquivalent parameter for the NSMenuItem.init. If the menu is open and we fire that keyboard shortcut, the menu highlights that item for us, like so:
![]()
One more piece of polish
After using the app, it sure would be nice to have a visual indicator of the Play or Pause state. Why don’t we use the greyscale asset above as the menu icon for when the app is paused and the colored asset for when the stream is playing? That seems pretty elegant.
Now, we already know when the stream is set to playing or paused via the togglePlayPause method, we should be able to just have an updateMenuIcon method that updates itself when the stream is toggled. Let’s try that —
@objc func togglePlayPause() {
    // ...
    updateMenuIcon()
}

func updateMenuIcon() -> Void {
    let imageName = isCurrentlyPlaying ? "npr-icon" : "npr-icon-greyscale"
    self.statusBarItem.button?.image = NSImage.init(named: imageName)
}
We should also update the applicationDidFinishLaunching method to use the updateMenuIcon() method instead of setting the statusBarItem’s image directly —
func applicationDidFinishLaunching(_ aNotification: Notification) {
    // ...
    updateMenuIcon()
}
Build & Run and toggle pausing and playing the stream. If you’re seeing the icon flip from greyscale to colored, woohoo! That’s what we’re expecting. 🖐🏻!
Finally, while we’re in this part of the codebase, let’s make the Play / Pause button title actually say what the action will be.
This will follow a very similar path from directly above, just with a few tweaks.
First of all, we’ll need to keep a reference to the playPauseButton. Let’s add a property to keep track of it —
let playPauseButton = NSMenuItem.init(title: "Pause", action: #selector(togglePlayPause), keyEquivalent: "")
Next, let’s add that instance of the button to the menu —
// Replace this line...
menu.addItem(NSMenuItem.init(title: "Play / Pause", action: #selector(togglePlayPause), keyEquivalent: ""))

// with this line...
menu.addItem(playPauseButton)
Next, in the togglePlayPause() method, let’s call updatePlayPauseButtonTitle() right after updateMenuIcon().
We can define the updatePlayPauseButtonTitle() method right below the updateMenuIcon() method —
func updatePlayPauseButtonTitle() {
    playPauseButton.title = isCurrentlyPlaying ? "Pause" : "Play"
}
Finally, in applcationDidFinishLaunching, just below the call to updateMenuIcon(), call updatePlayPauseButtonTitle(). Doing this will keep the button title and the menu icon in sync.
Build & Run and we should have a menuItem that updates the title properly.


Nice work so far! We’ve got an app that works (as long you as hard-code the proper URL for the desired audio stream).
This is a good stopping point for Part 1. If you’d like to download the code for where we’re at, here you go.
In Part 2, we’ll focus on adding a Preferences window with the ability to change stations, integrating media key shortcuts & adding some more functionality to the dropdown menu.
To see when Part 2 is ready, follow me on Twitter or subscribe to this blog’s RSS feed.
In the meantime, I hope you consider donating to NPR.